

Surface FX Process
Step #1 Surface Inspection

It all starts with the basics – measuring your space and checking out the concrete.
We look at a few key things to make sure we prep it right:
-
Moisture levels
-
Structural integrity
-
Surface hardness
These details help us figure out exactly how to tackle the most important part of the job — proper concrete prep. It’s the foundation for a floor that lasts.
Step #2 Surface Preparation

We don’t cut corners — we cut concrete.
The industry’s so-called “easy button” usually means a quick acid wash and rinse. But here’s the problem: leftover moisture on the surface before coating leads to weak spots — and shortens the life of your floor.
That’s not how we operate.
Our crews use professional-grade diamond grinding equipment only. It’s cleaner, tougher, and far more effective.
Diamond grinding removes any soft or damaged concrete, opens up the surface, and leaves behind a strong, porous profile that’s ready for coating — no chemicals, no downtime, just proper prep.
It’s no different than sanding wood before staining — or the prep work a body shop does before painting.
If you want a floor that looks great and holds up, the prep has to be done right
Step #3 Surface Repairs

Now it’s time to rebuild what has deteriorated.
Before Surface FX will apply anything new, we make sure your concrete is solid. That means tackling cracks, pits, and spalling head-on.
We use diamond blades on handheld tools as well to open up damaged areas — no shortcuts, no hiding the flaws. Once exposed, we apply a fast-curing filler with stitches if needed that sets harder than the concrete itself. In just minutes, those weak spots become stronger than ever.
The result? A foundation that’s built outlast your home.
Step #4 Apply the Coating

This is where it starts to get exciting!
For most garage floors, customers will choose a full broadcast system — it’s tough, good-looking, and built to take a beating.
Surface FX kicks things off by cutting in the edges with the base coat — a 100% solids, self-leveling epoxy that dries slower to ensure seepage into all available pores of the prepared concrete and that means serious business. Then we lay down the main coat, pouring it in smooth lines and rolling it out evenly to get just the right build and coverage.
Mix, pour, roll, repeat — until your floor is fully coated and ready for the next step.
Step #5 Chip Application
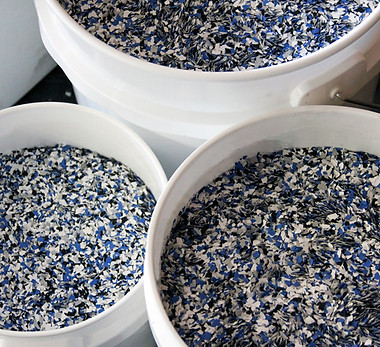
Time to bring the floor to life.
Once the base coat is down, we mix up the flake — making sure the colors are perfectly blended — then let it fly. We broadcast the chips by hand across the entire floor, tossing more than we need so every inch is covered. This gives the floor that rich, consistent texture and color it’s known for.
After the flake layer cures, we go to work cutting and scraping the surface. Front to back, side to side — we hit it from every angle to knock down loose or standing flakes. The result? A smooth, even texture that feels just as good as it looks.
Step #6 Top Protective UV coat

The Grand Finale – Clear Coat & Go Time
With your floor fully flaked, scraped, and cleaned up, it’s time for the final touch — high-performance clear coat. We mix up the UV-stable polyaspartic topcoat and pour it straight onto the floor. From there, we use a soft squeegee to spread it out to the perfect thickness, followed by an 18-inch roller to smooth it all out and eliminate any lines.
The result? A sleek, durable, glossy or matte finish that seals everything in and makes the whole floor pop.
Give it 24 hours, and you’re good to walk on it. After 48 hours? Pull the car in, you’re ready to roll.
It’s not just a floor — it’s a game-changer.